June 6th, important day in history and once again we gathered at Deaf Ear Records in LaCrosse WI to game.
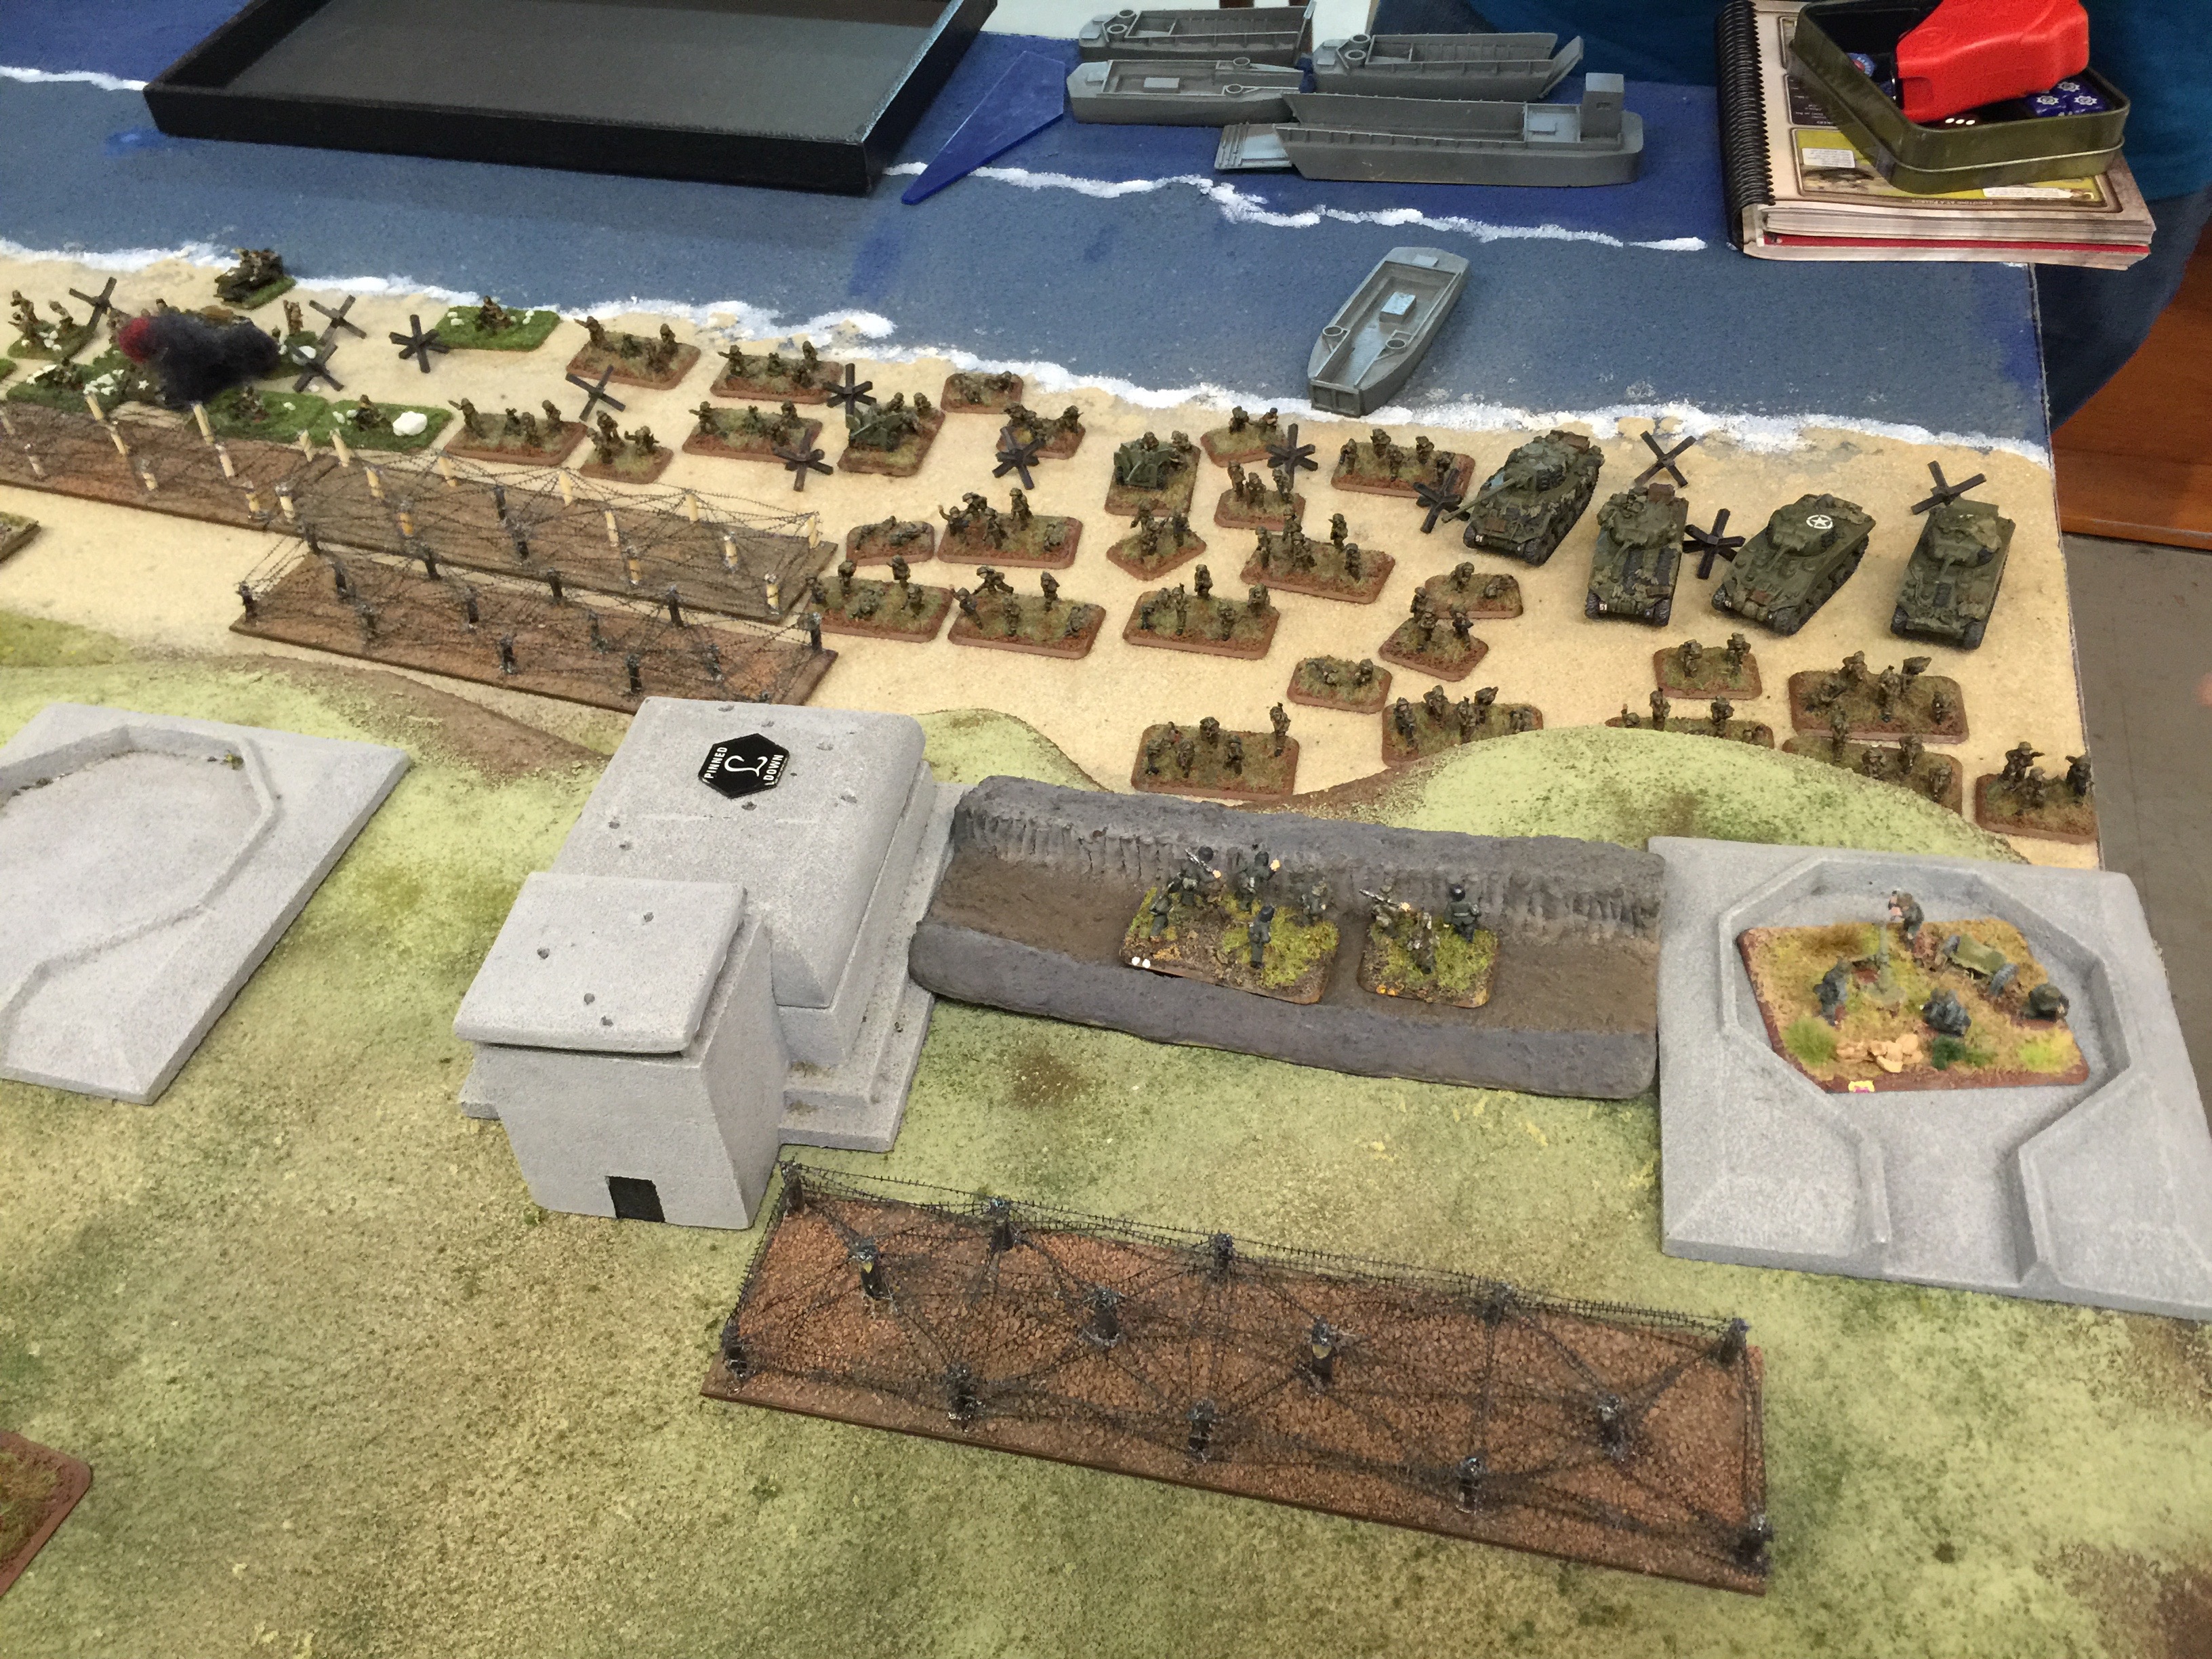
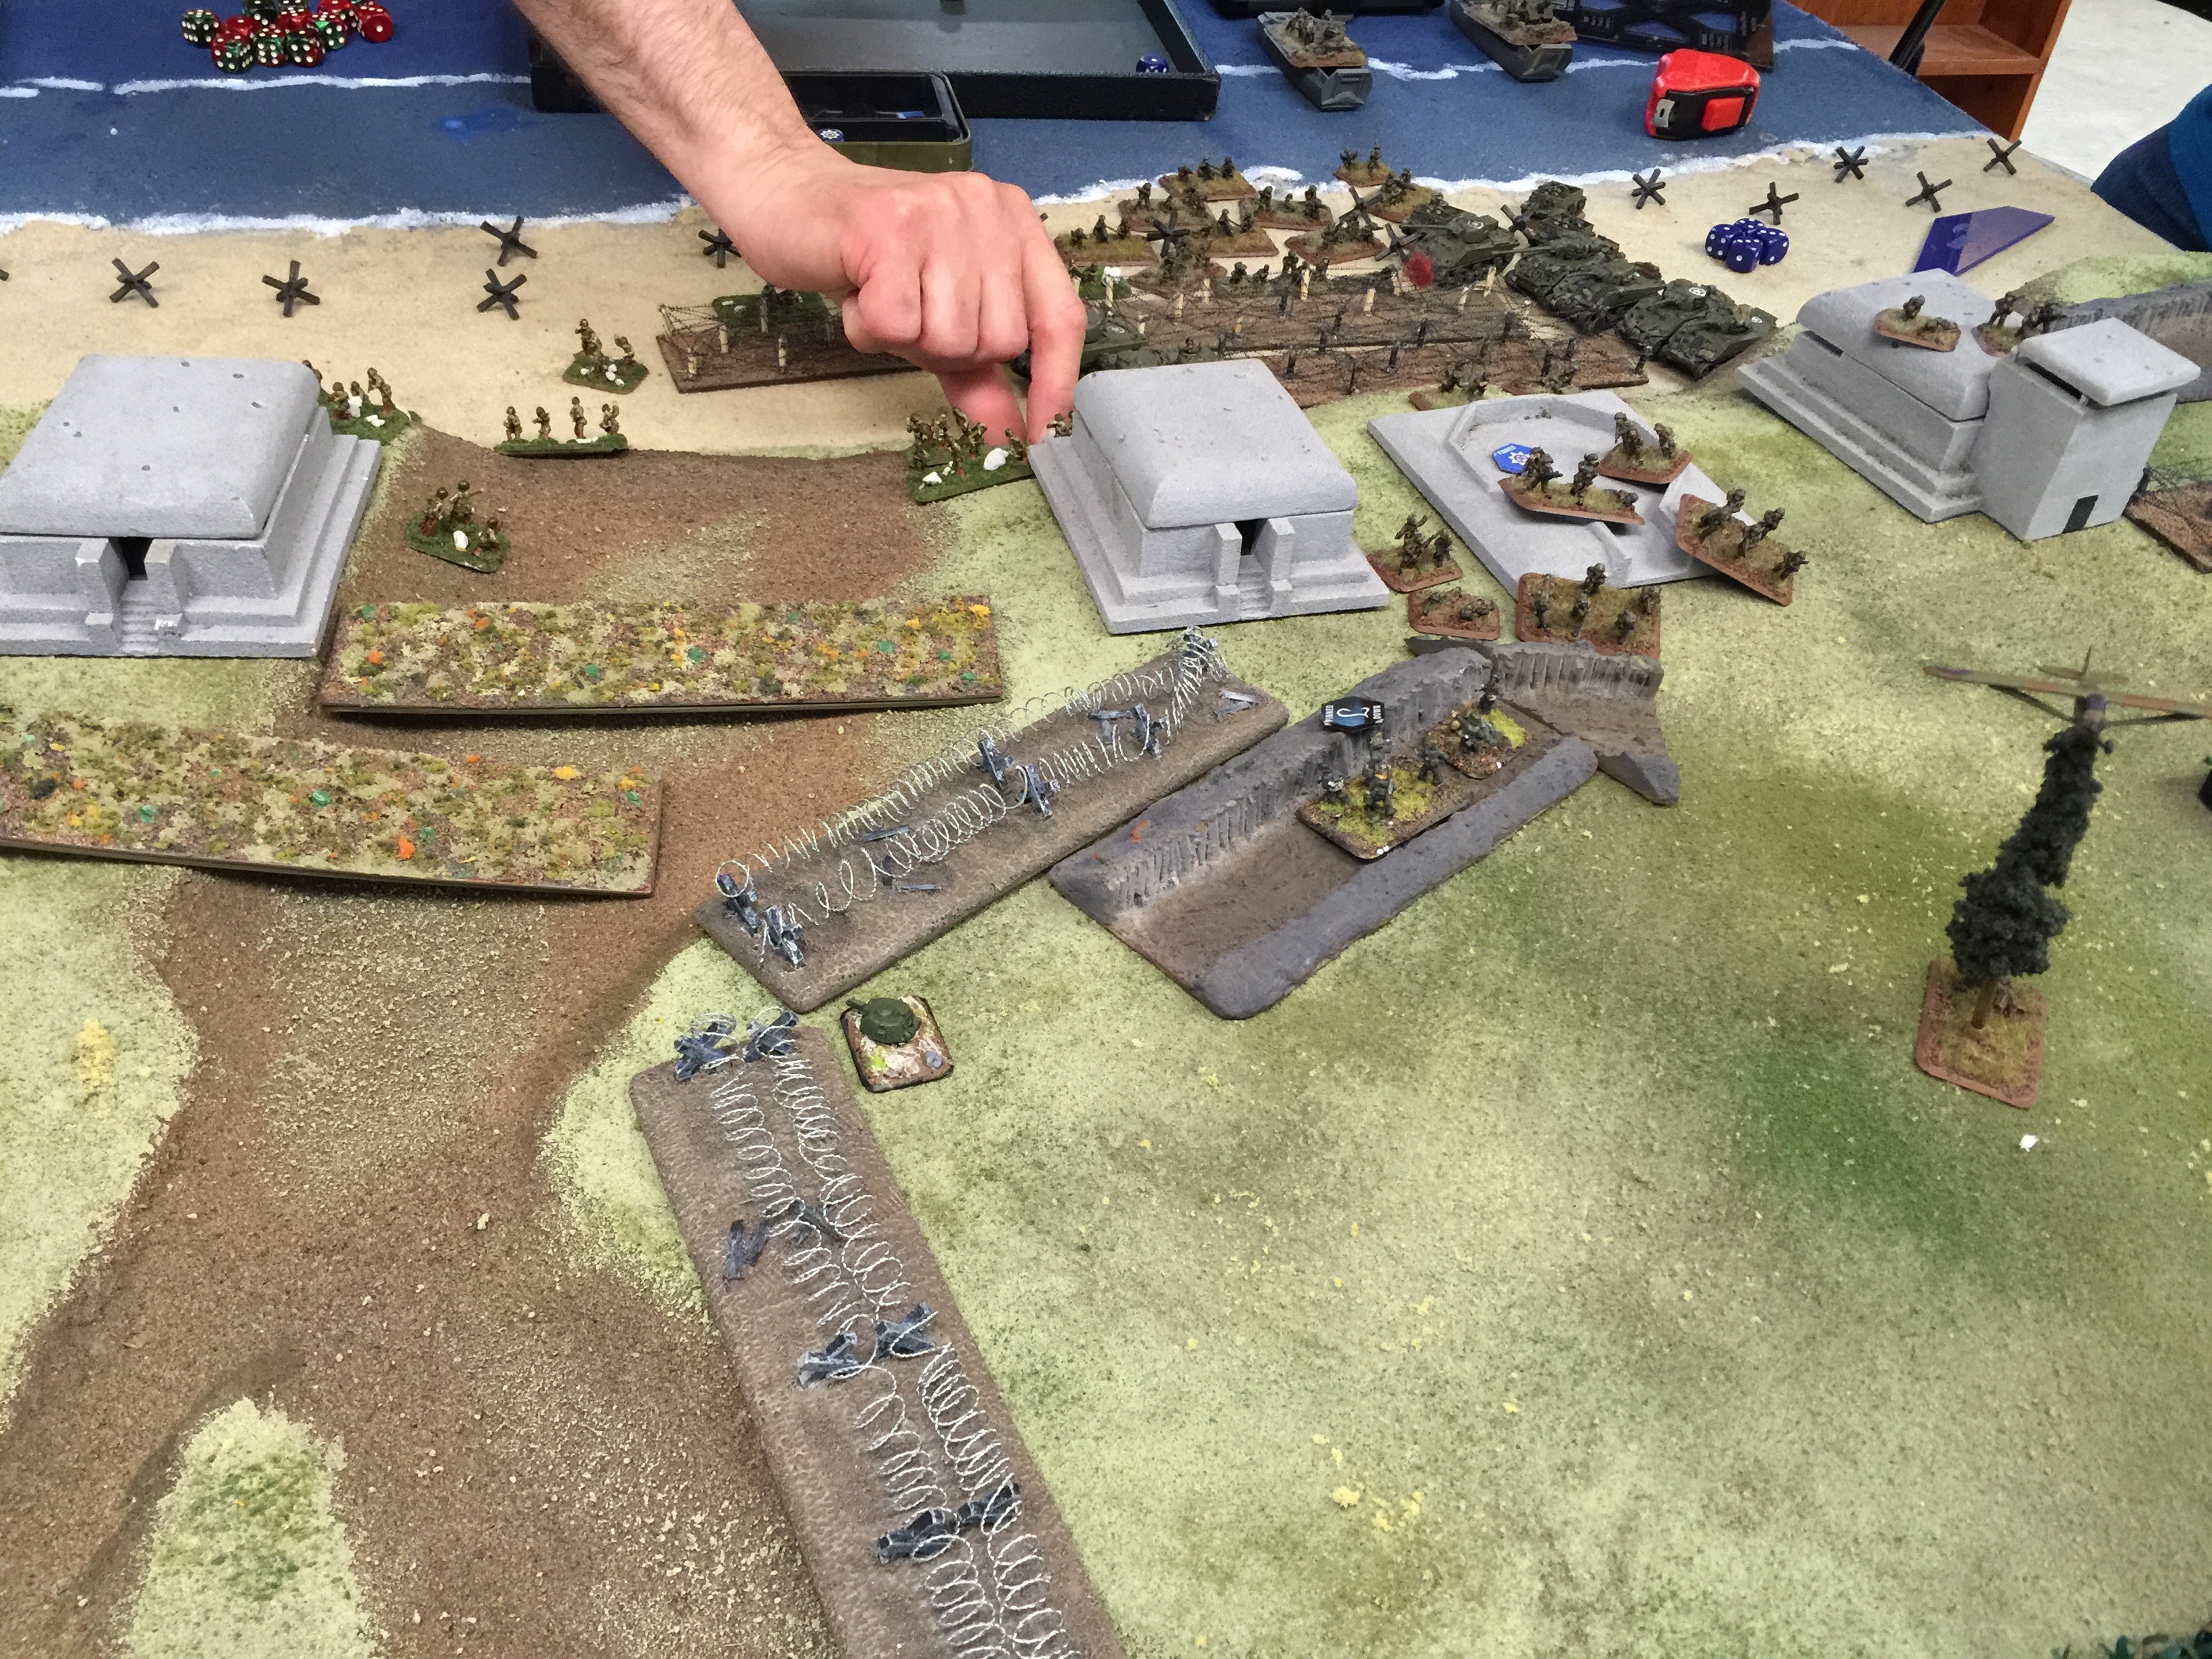
Bill got his wish and we put on a D-Day on D-Day. Bill in particular put in a lot of work putting together the special table and the wire to make it happen. Across the guys, likewise a bit of new lead here in there and especially landing craft. I think you’ll agree the table is a real visual treat.

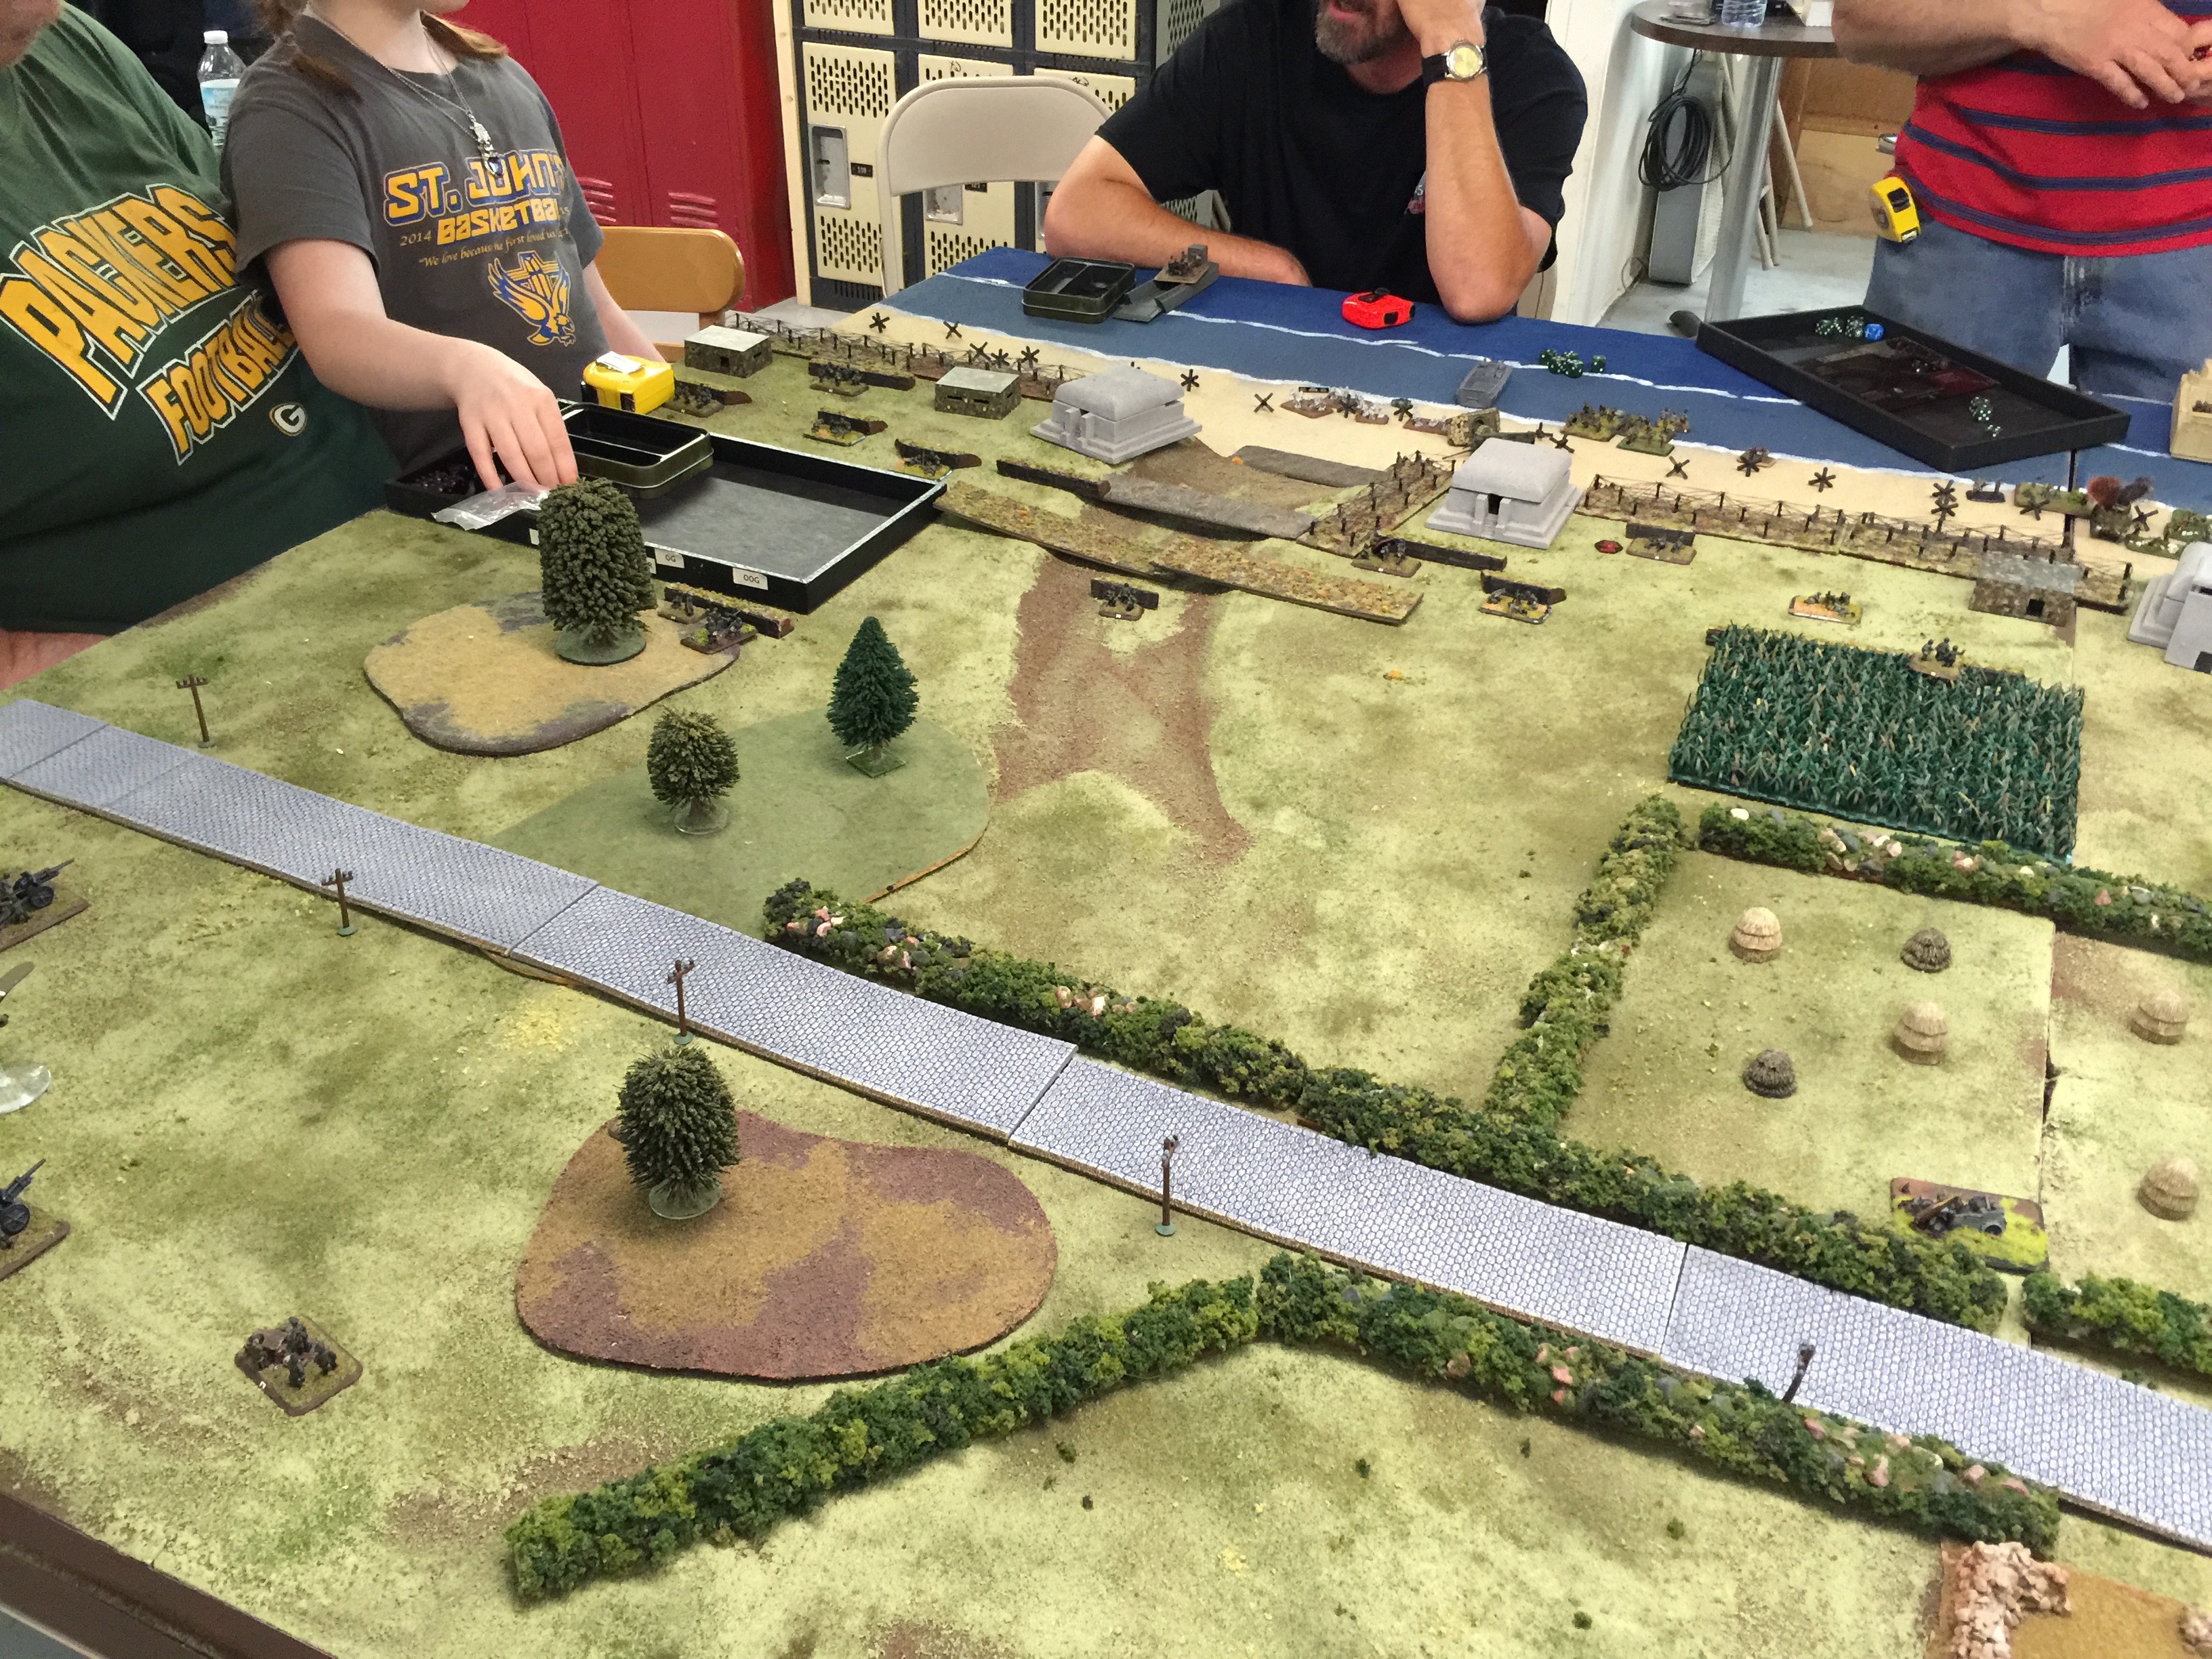
We had two 4×6 tables put together so the length of the beach was 8 feet with 6 foot of depth for the break out.

We had 3 a side, with Mark, Chuck and myself playing German and 3 on the Allied side with 2 playing American (Collin and Bill) and Keith playing British. Keith drove all the way down from the twin cities to make the game. Really nice guy and certainly hope to see him again, not to mention builds the prospect of getting some future games going on up in the cities.
For sides, the Germans each had 1000 points picking from the Atlantik Wall book. The Allies each had 1750 points and picked from the Overlord book. For the landing craft rules and such Bill had a couple copies of “Das Book” which was instrumental throughout the game but otherwise we were playing solidly v3 Flames of War. For me it was the first time using Flames of War for an amphibious assault and it seemed to work really well.

On the German side we decided to have Chuck and Mark both field Festung (Omaha) companies and I’d be the relief picking from the 21st Panzer for the counter attack. For me I’d be acting as delayed reserves and instead of successful rolles of a 5+, 6 with the rolls starting on turn 3. I prepared for a long wait but still, was quite a pleasure to watch the action unfold.
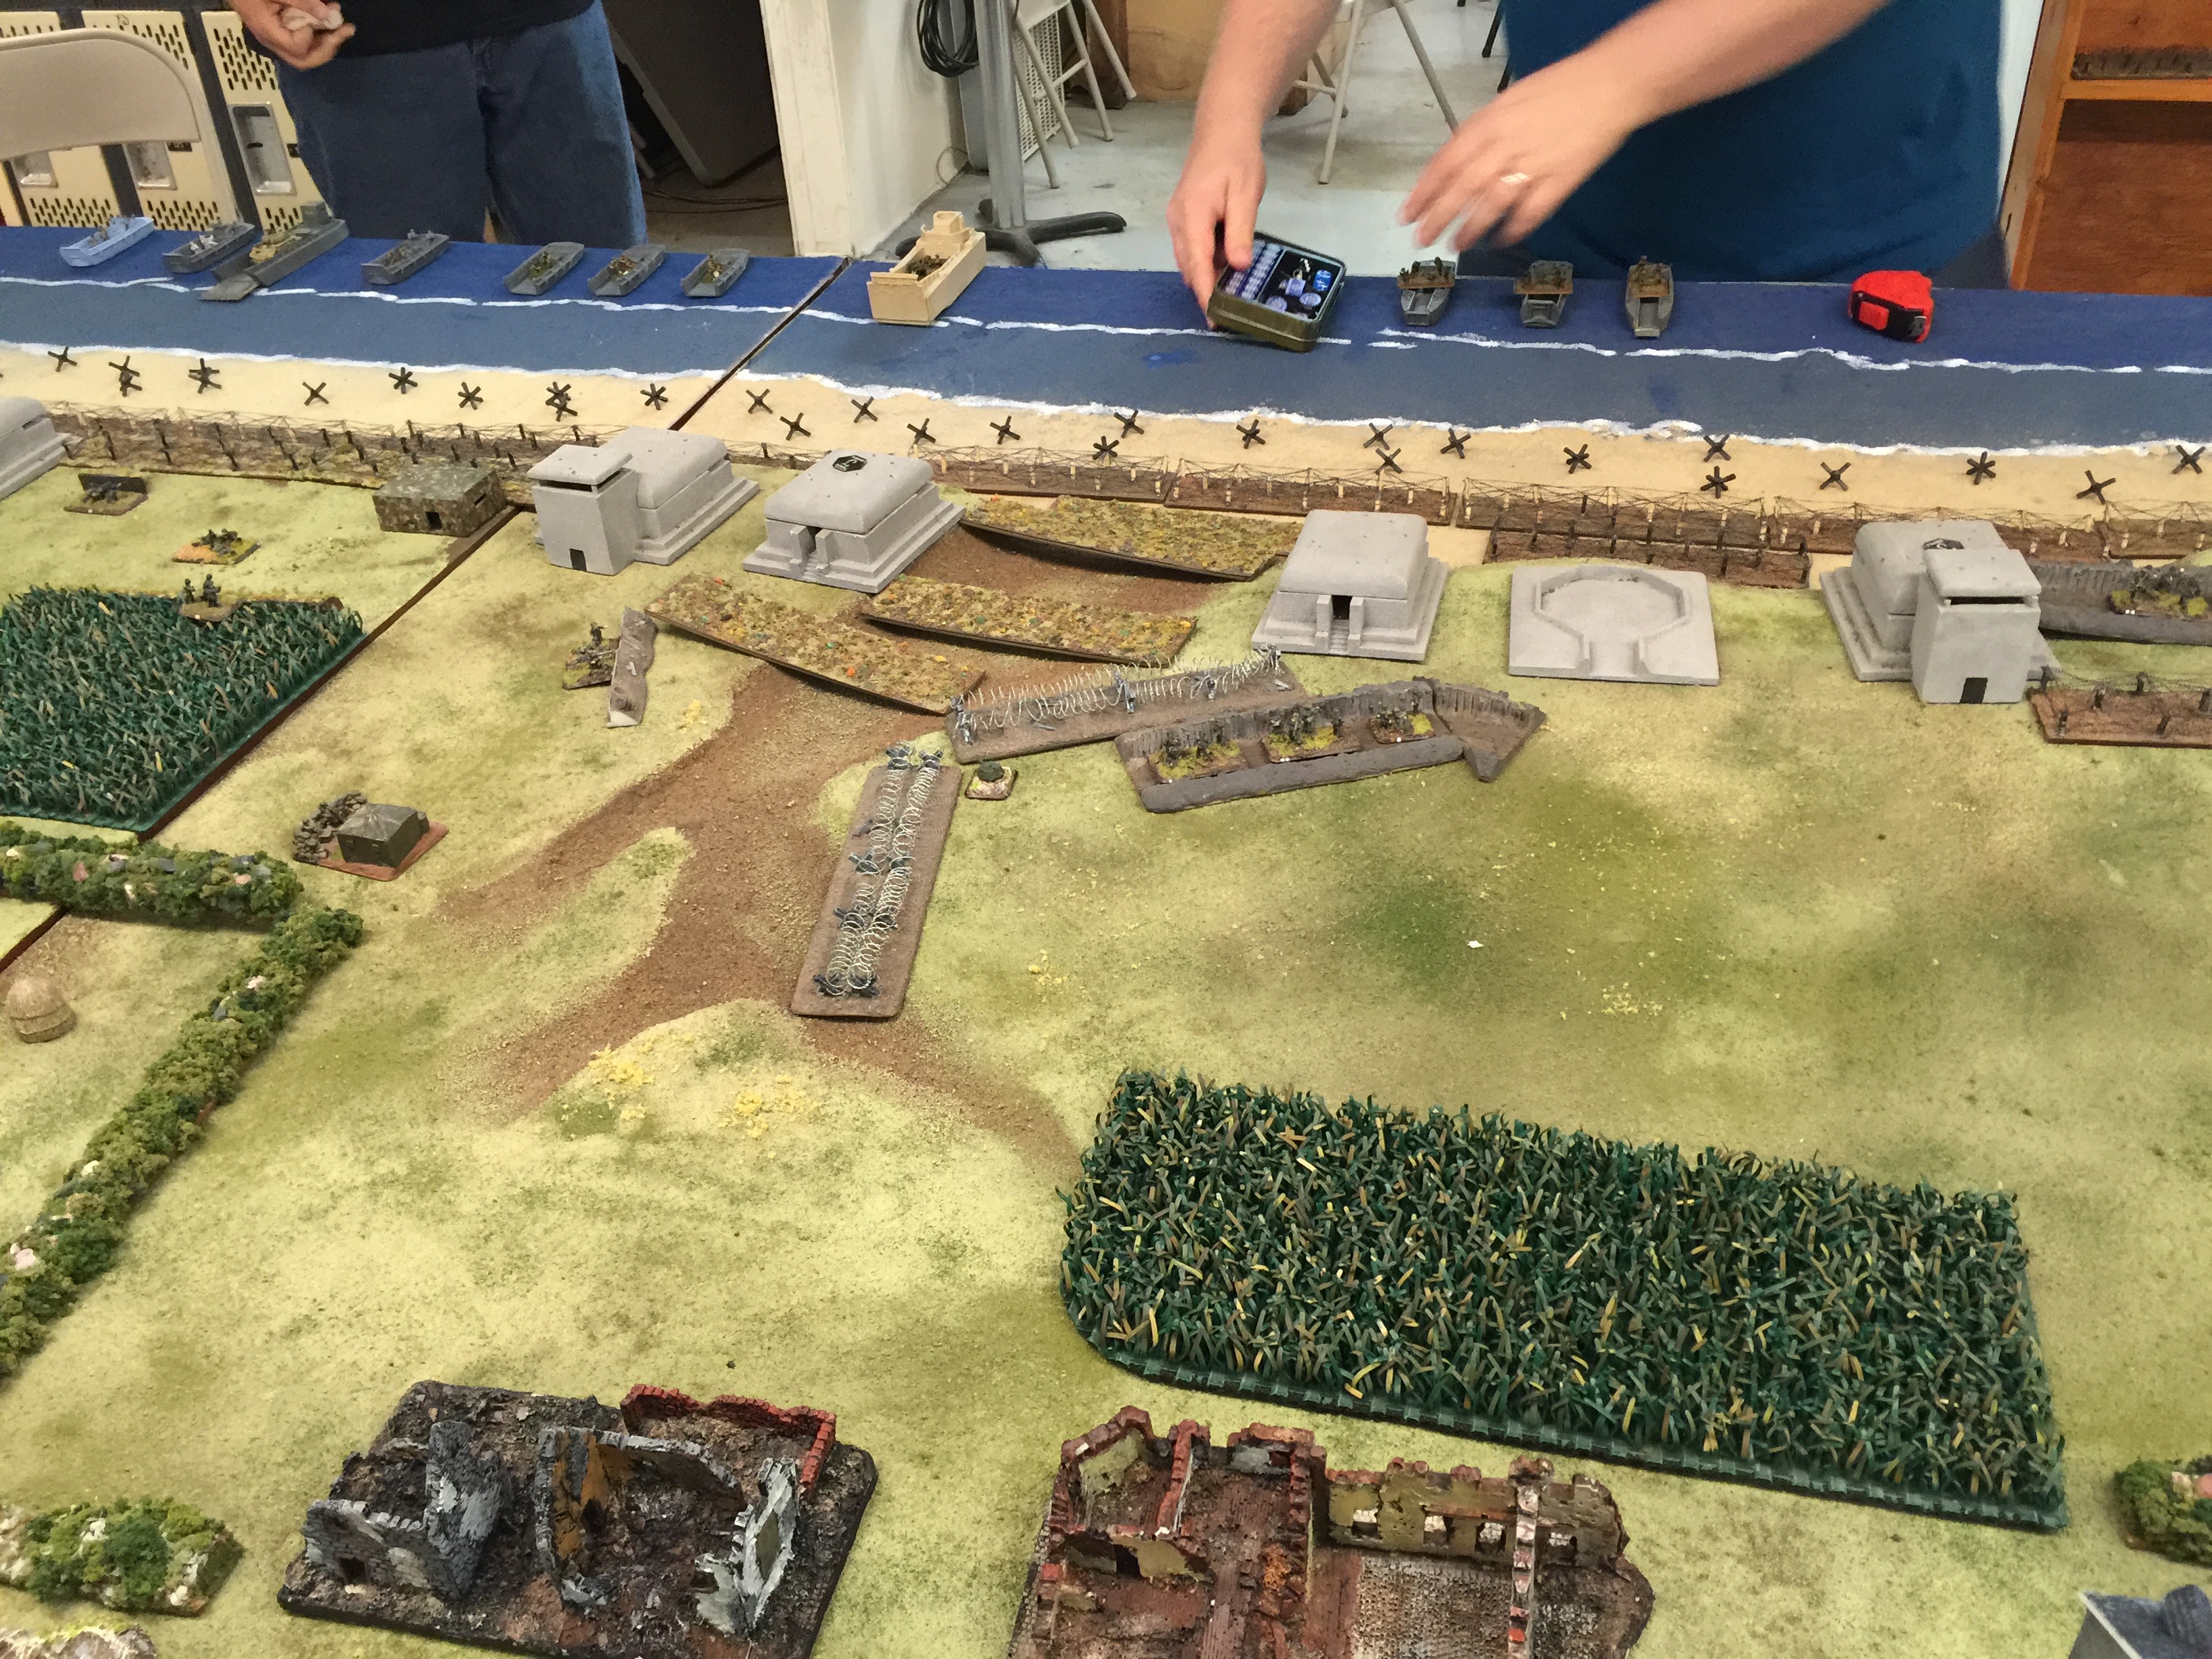
The Allies had their job cut out for them. They could scale the “cliff”/”hill” edges with infantry but vehicles had to go up these breaks in the hill, like this one near the center of the table. Plenty of land mines and wire to deal with so as the landing craft started to make their way ashore they’d have their work cut out for them.
On the bombardment Mark lost a good number of teams (5? 6?) and Chuck really lucked out with the loss of just 2 teams.
For defenses, going from right to left Chuck had an 8cm mortar, HMG, 2 7.5 Paks and the an HMG and then various MG teams here and there making up two platoons all total. Mark on the German left flank had something similar but I didn’t get a chance to write it down. Both of the objectives were approximately in the middle of the table.

With the initial wave hitting the beach, it was a good collection of infantry, some pioneers and shermans here and there. A few landing craft got delayed coming in but over all the Allies were able to get an effective force on the beach on the initial turn to start to get after all the wire.

With FoW you have two options on wire, either try and get through or try and gap it and thus remove. Closest Keith rolled well and gapped effectively from the get go. Unfortunately then these units had to weather the initial fire from everything Chuck could throw at him. In the middle of the table Bill came on with a couple of Shermans, to accompany his infantry and one was taken out. The above picture is from the bottom of turn 1. Off in the distance you can see Collin likewise came on with Shermans and infantry that successfully was able to gap 2 sections of wire creating a nice opening for him to flow through.

On Marks side behind the lines, he had the only bit of German artillery which immediately attracted the naval bombardment fire. In the course of two turns it was down to two guns.

Collin also had air, P47s to support him. With the Germans being almost entirely down on the beach the air really didn’t have a place or a use until later on in the game when German reinforcements would arrive. Even then special rules required a 6s for air to be available since it was presumed they were “busy” elsewhere.

Next the allied infantry pushed further ashore in the spots they had gapped the wire, in hopes of assaulting the various bunkers and pillboxes. This is where the tactics employed by the allies evolved through the course of the game. The initial early assaults were thrown back, with the German emplacements being within 16″ of each other, they were able to fire defensive fire in support of the assaults. (Special rule, it’s in the book) The allies were having a hard time pinning the bunkers but often did. Still between vet and trained infantry, out in the open at 3+, 4+ to hit, throwing back assault attacks was pretty common at the beginning of the operation.

On the German left flank, Collin was having an a rotten series of luck. Between Mark’s daughter who was rolling for him and rolling really really well, and the bad rolls that Collin was having, Collin’s men just couldn’t keep a toe hold. After two turns there were a few platoons picked up due to failed morale rolls.

About this time, the Allies remembered to use smoke. to prepare positions. Putting this down in prep for an assault gives defensive fire at +2 which really helped tip the balance towards success in those cases where the bunkers and pill boxes could be masked from support through smoke as well as through pinning fire.
Sounds simple, it wasn’t and my hats off to the Allies for being able to put it together.
The waves of further material and men continued to flow in.
Here you can see Bill off in the distance assaulting two of Chucks pill boxes, one with an HMG team in it and one with a 7.5 gun in it. While Chuck was pinned all over the assaults were thrown back.
This was also I think from turn 3 as it Keith was able to get a set of anti-tank guns ashore. Effective little beasts!

Further down the shore on the same turn, Collin likewise trying hard.
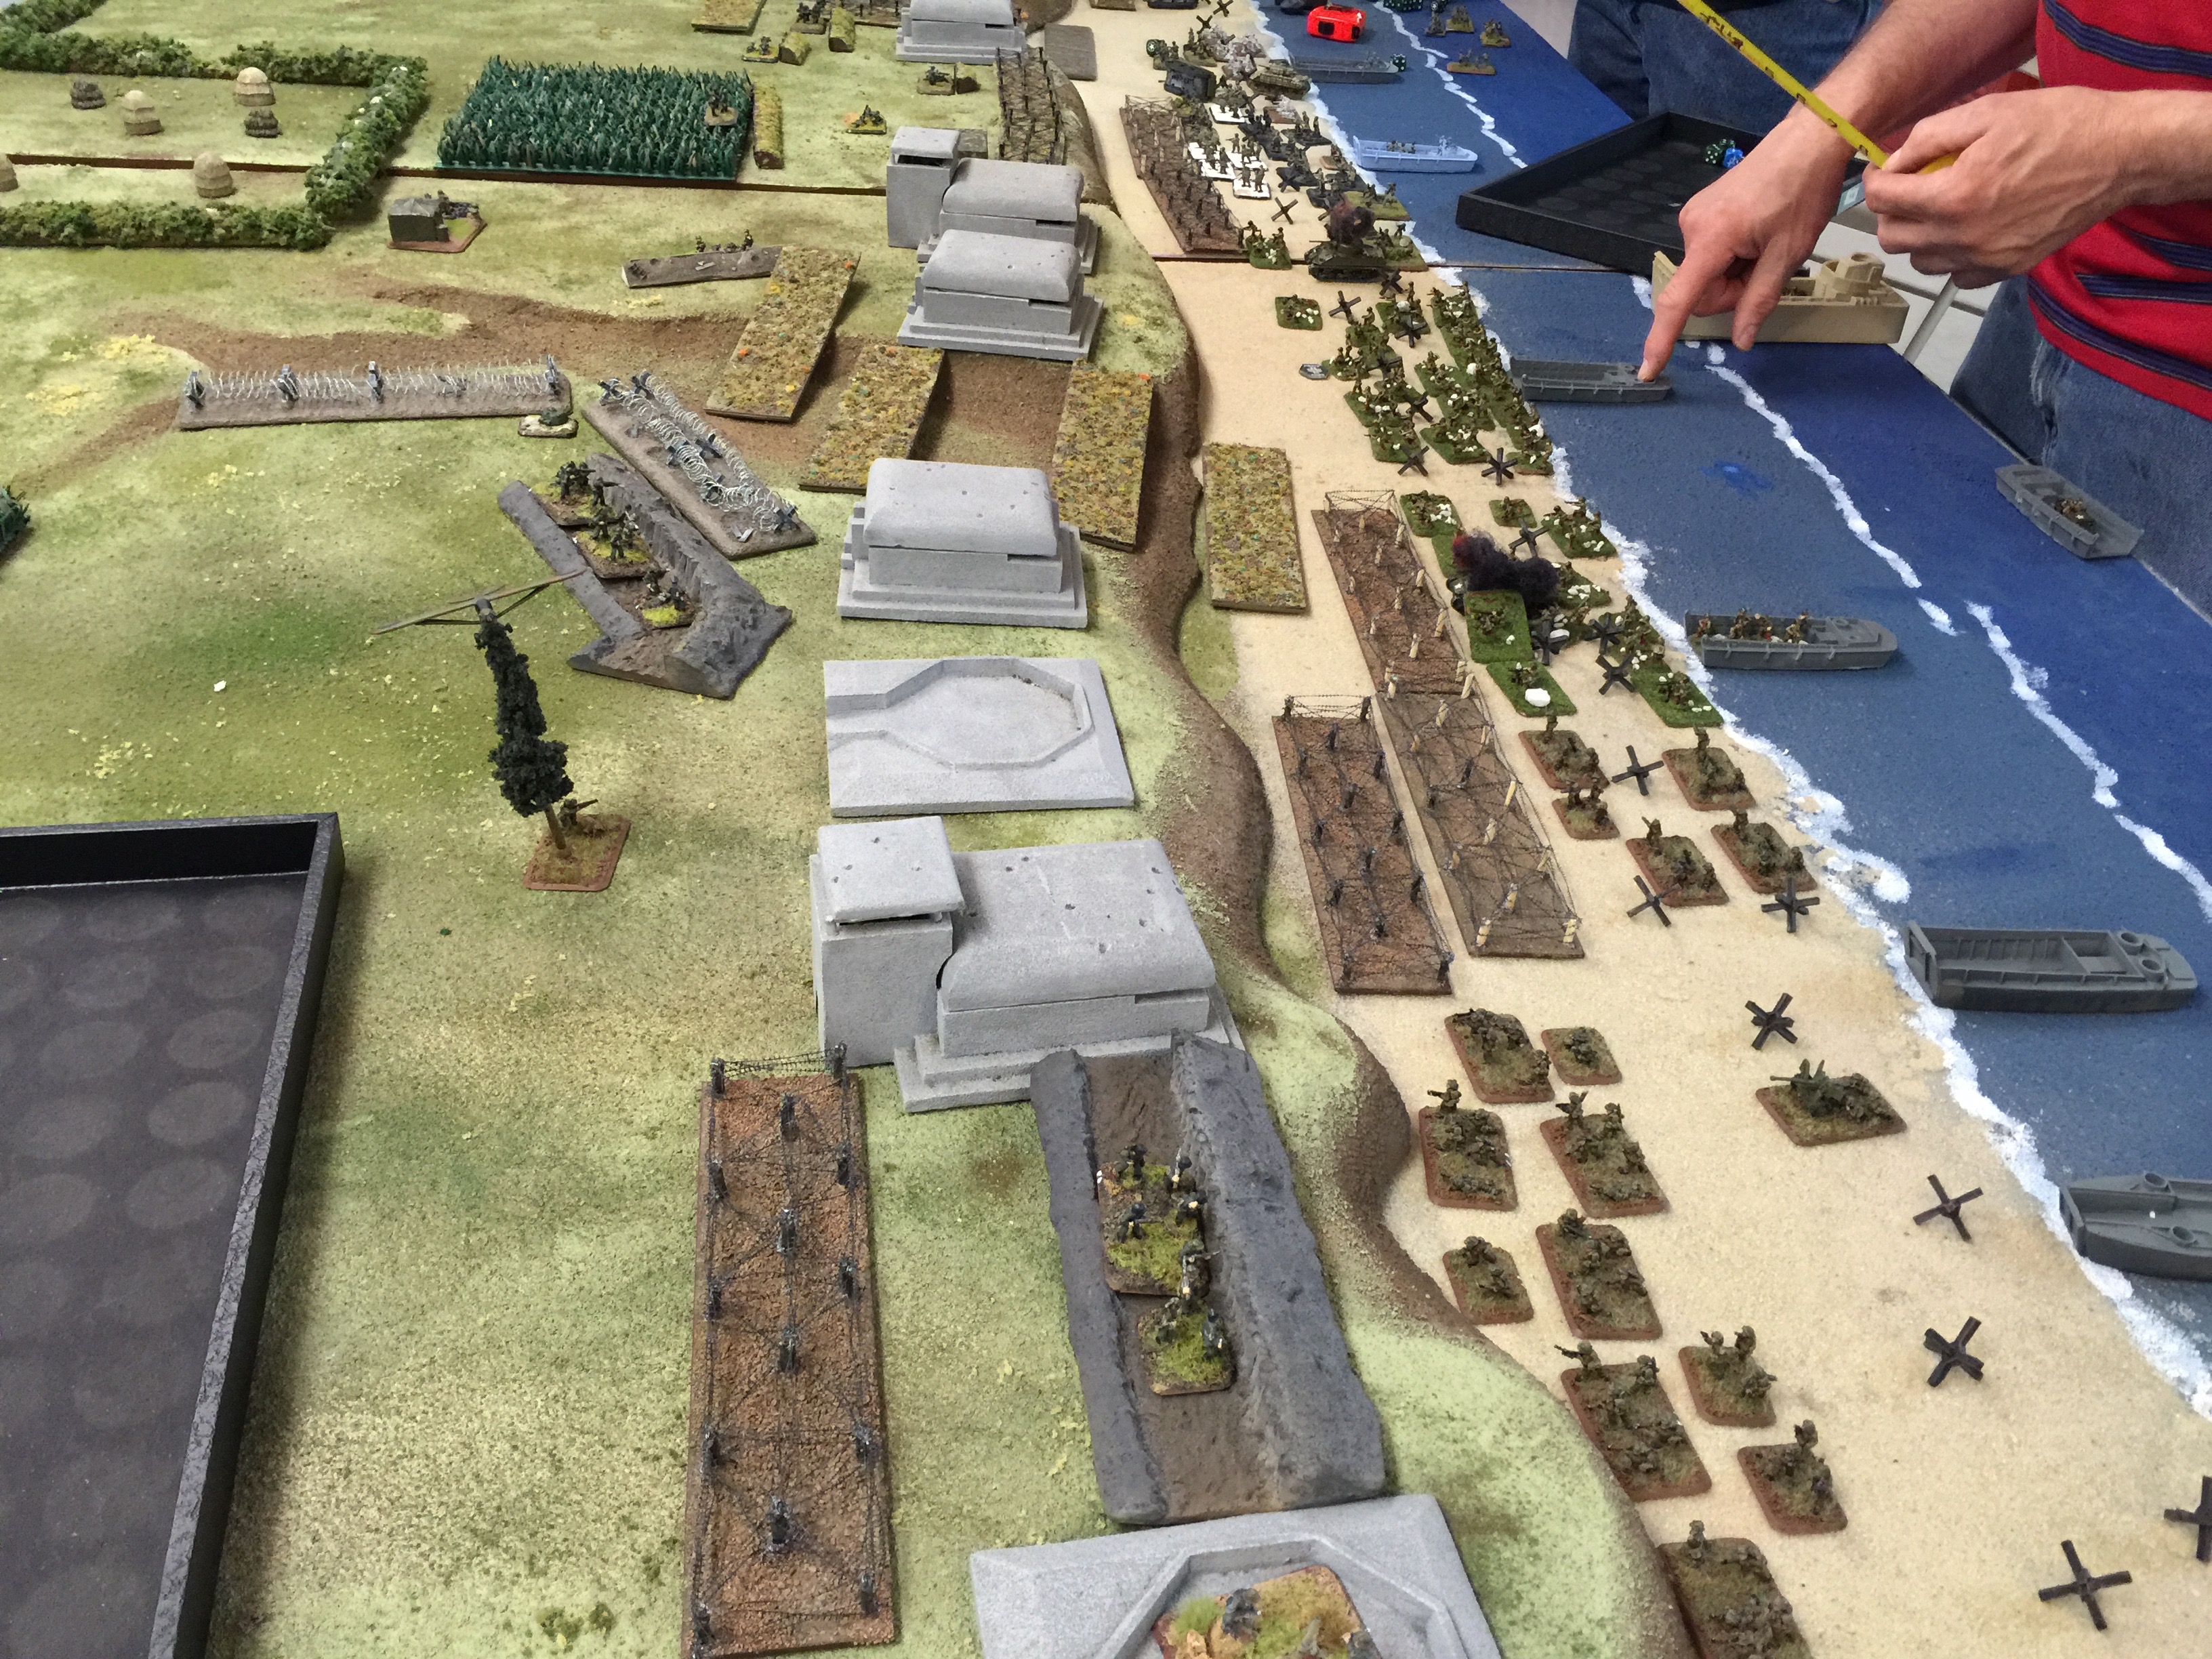
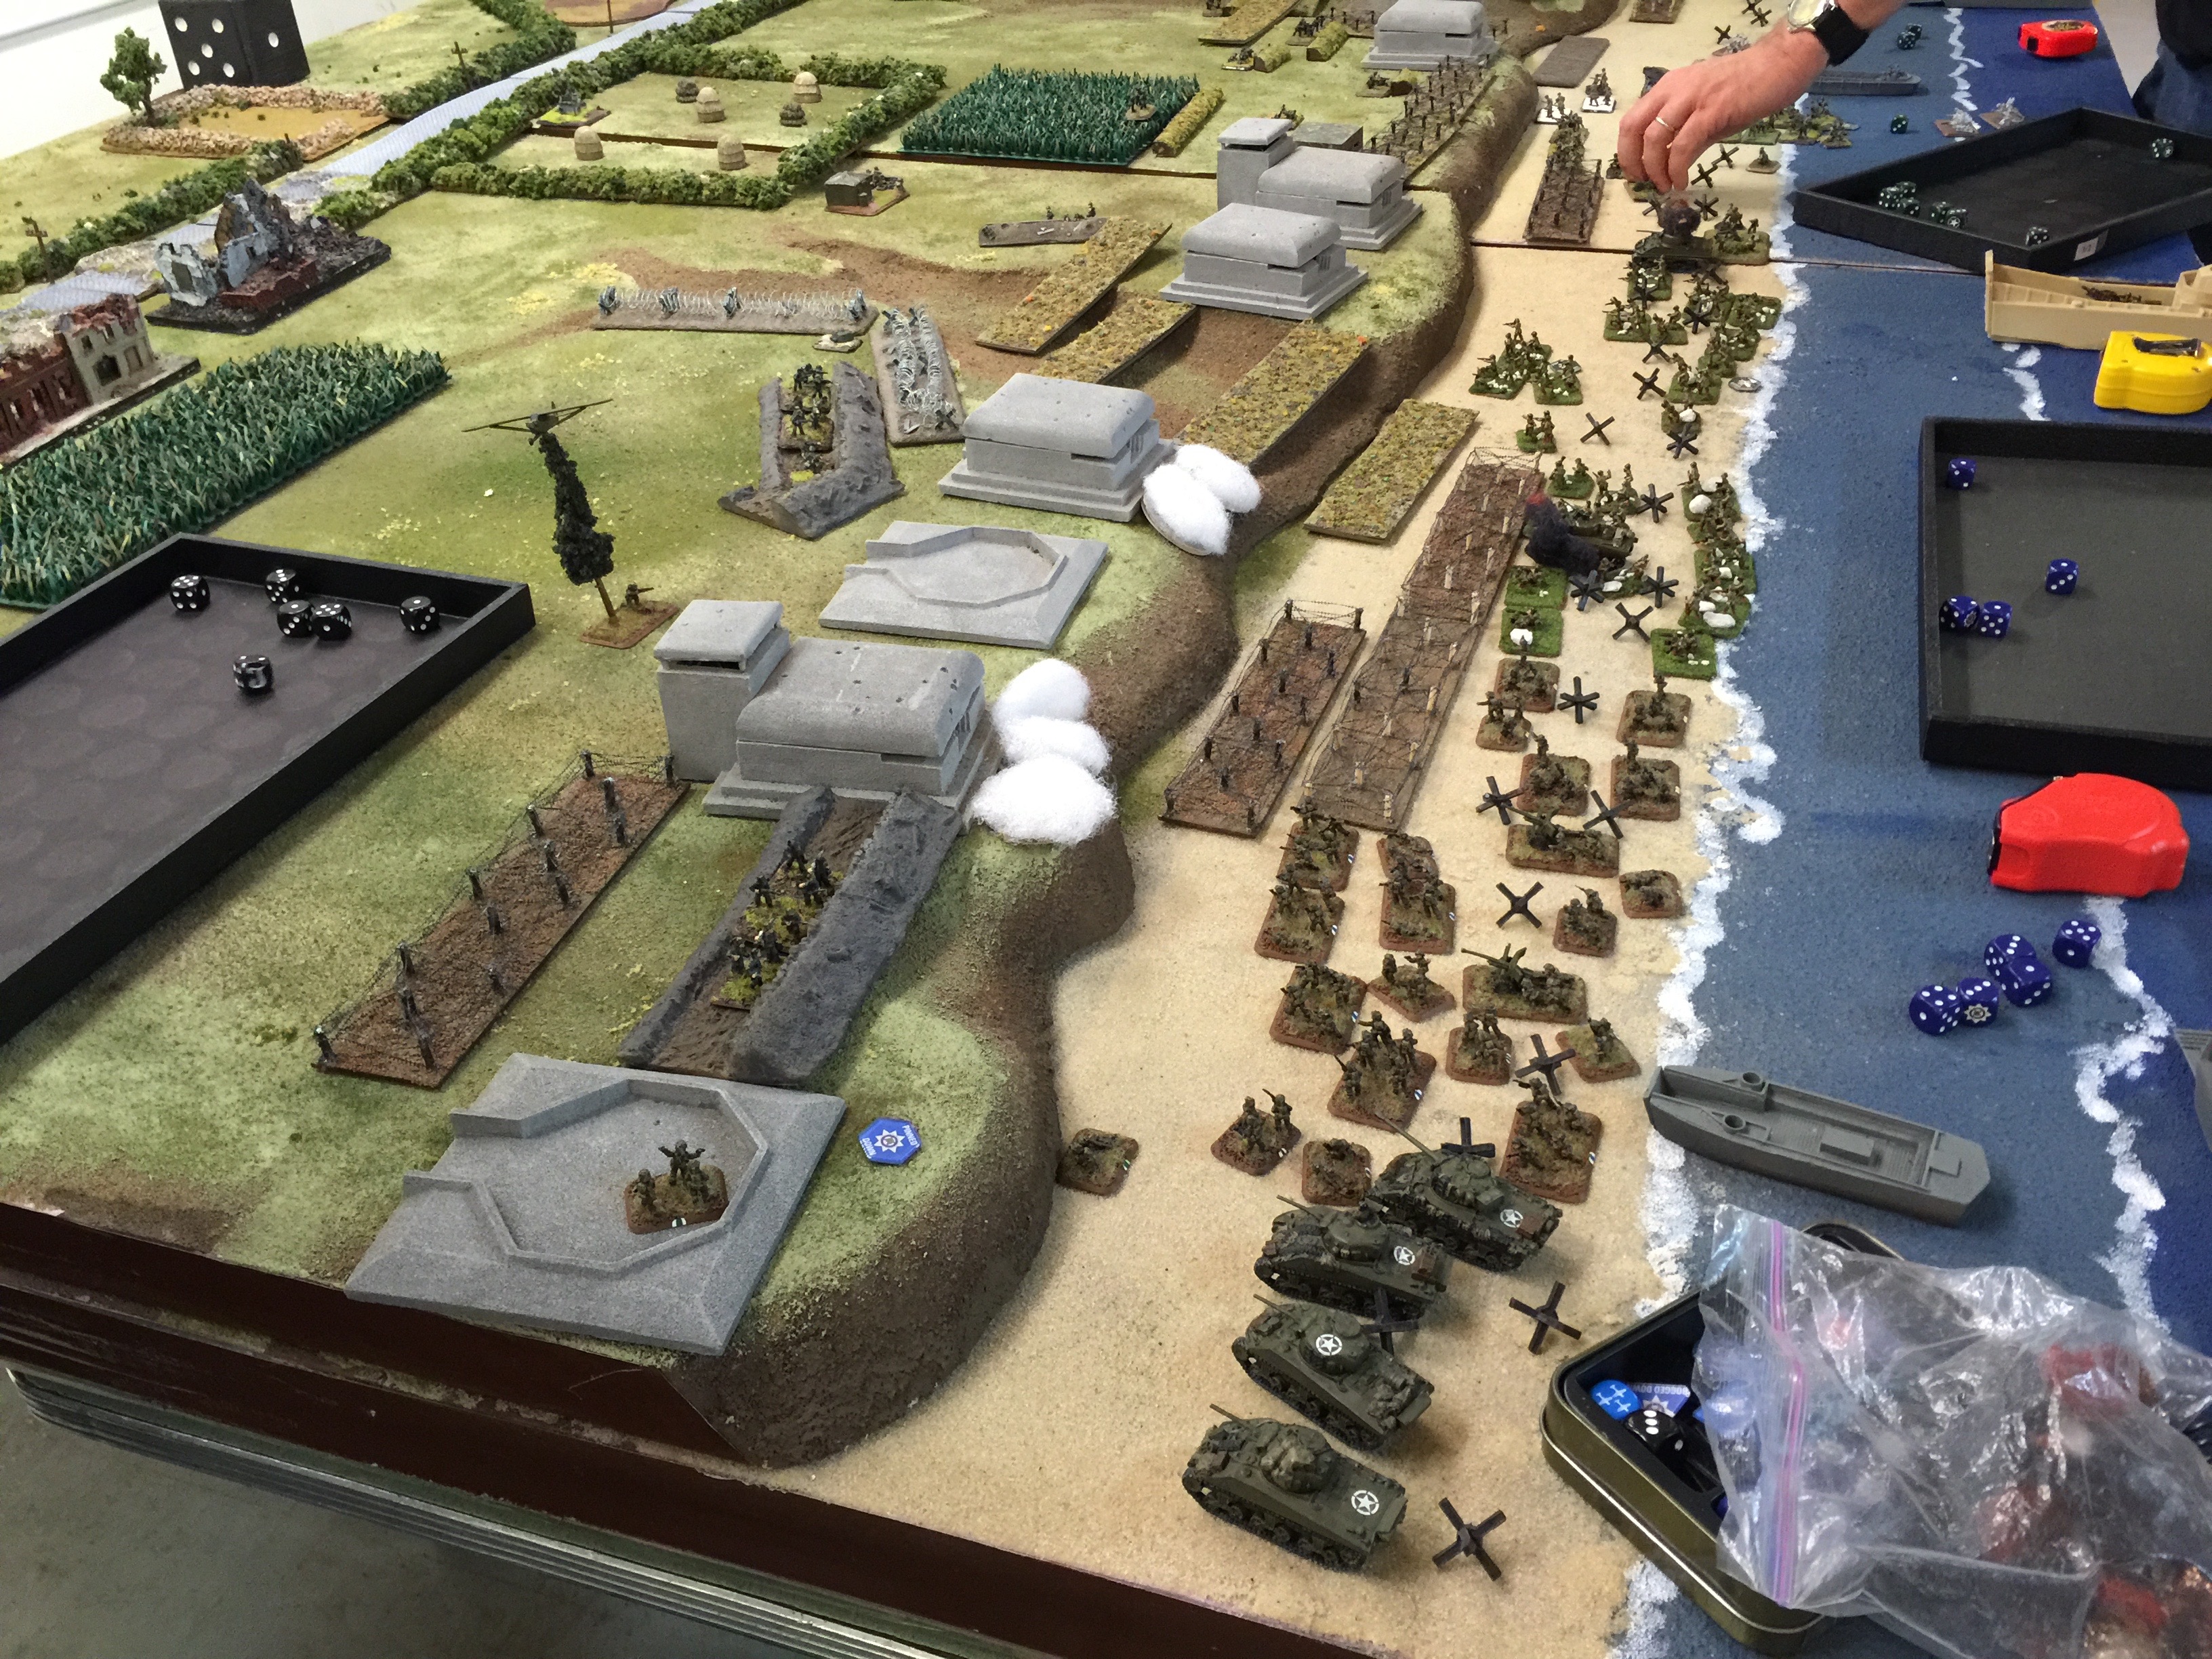
And the next turn, (Turn 4 I think) Keith landing Shermans now and another wave to assault up the hill. The tanks would be in a slight pickle as they couldn’t assault up the hill and would have to head down the beach a bit to go up one of the breaks.
Still no German reinforcements to be seen.
Another view and it captures an important moment. Keith had a hero (I’m not sure which one) but they made it up on the hill and were in one of the tobruk pits. The 8cm mortar that had been there earlier… was no more. The first little break in the German line.
Also you’ll notice that Keith and Bill are starting to use generous amounts of (effective!) smoke on the bunkers.
Meanwhile on the German left flank, Mark’s daughter pretty much had stopped Collin’s force. The thunderbolt spent. Great die rolling will do that! Certainly Mark’s operational direction helped :-).

Turn 5, the German line still holding. We’d see our first German reinforcements this turn, and I’d bring on my first platoon of Panzer IVHs. Meanwhile down on the beach, Keith pulled gathered more Shermans on shore and setup for the assault.
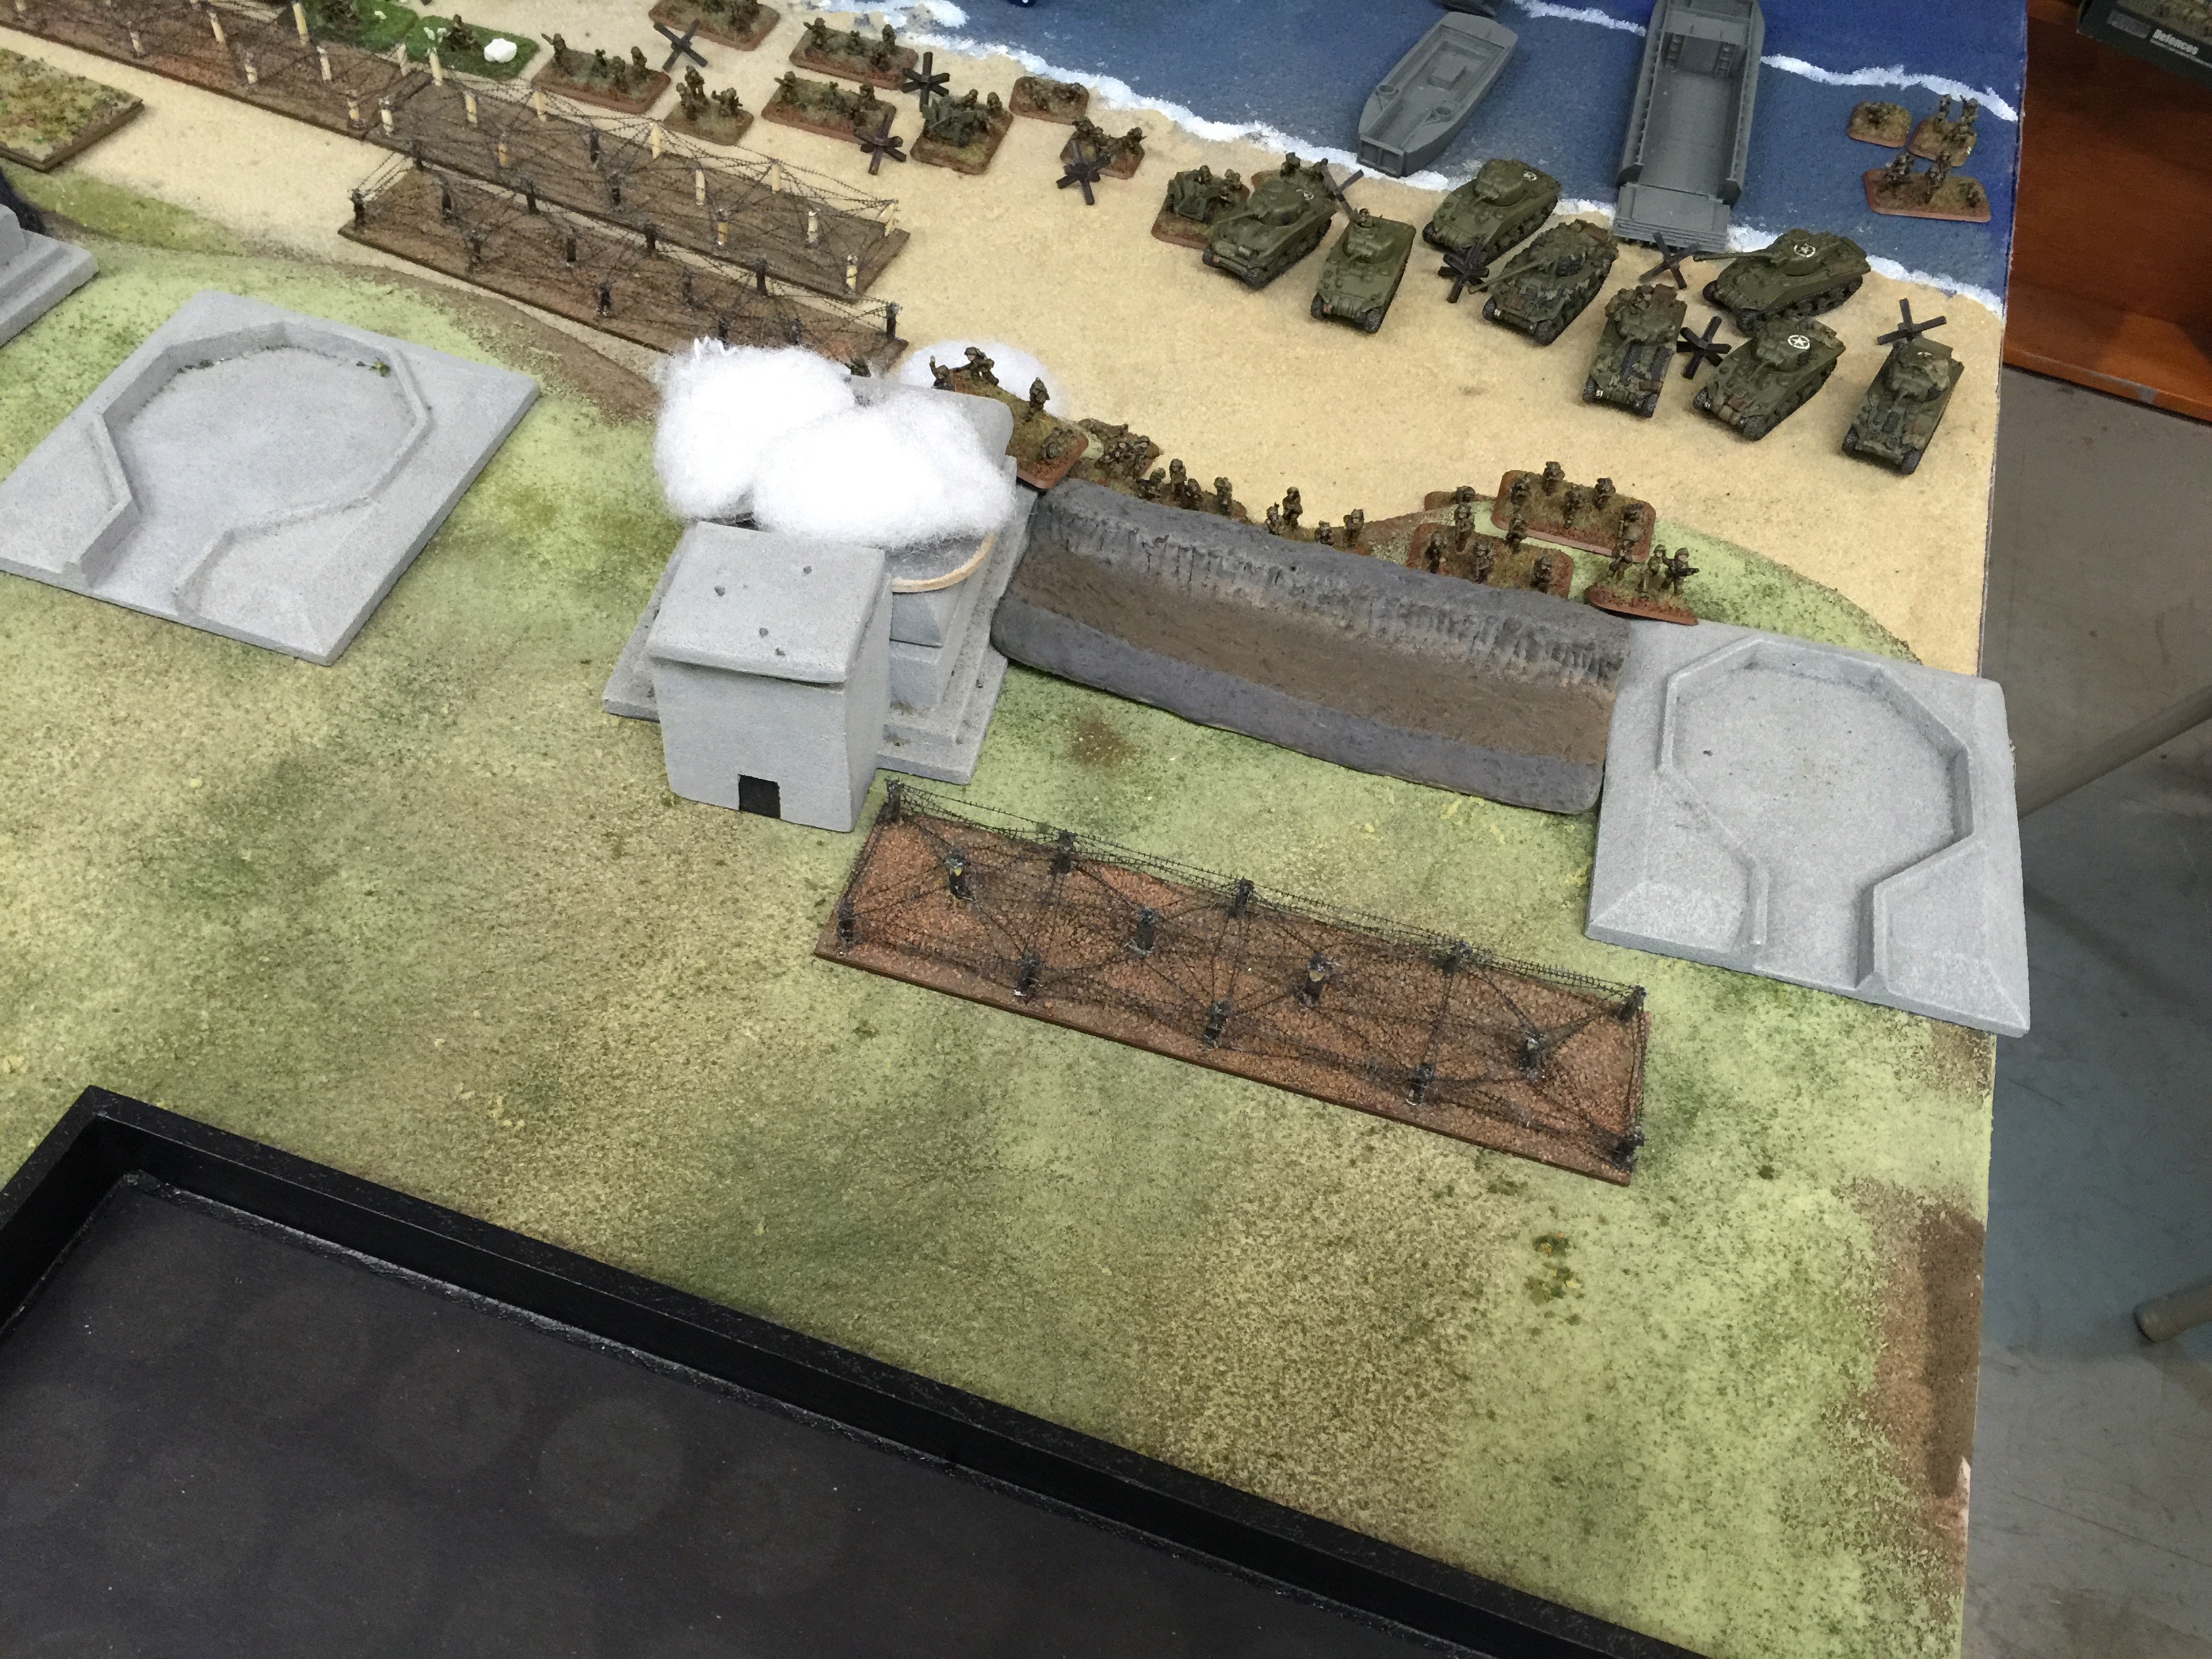
And here it comes … with the bunker smoked, the line pushing forward, this time Chuck just couldn’t hold them back and the position fell. Well done Keith!

In the next turn pretty clear our flank was turned but things were far from over. There were four minefields those tanks would need to drive through if they were to get up the hill and clearing those would not be easy.

Here come the reinforcements! Granted it took the “pity” rule of having 3 reinforcement die to roll, still failing to get a 6 and getting one anyway due to the rules.

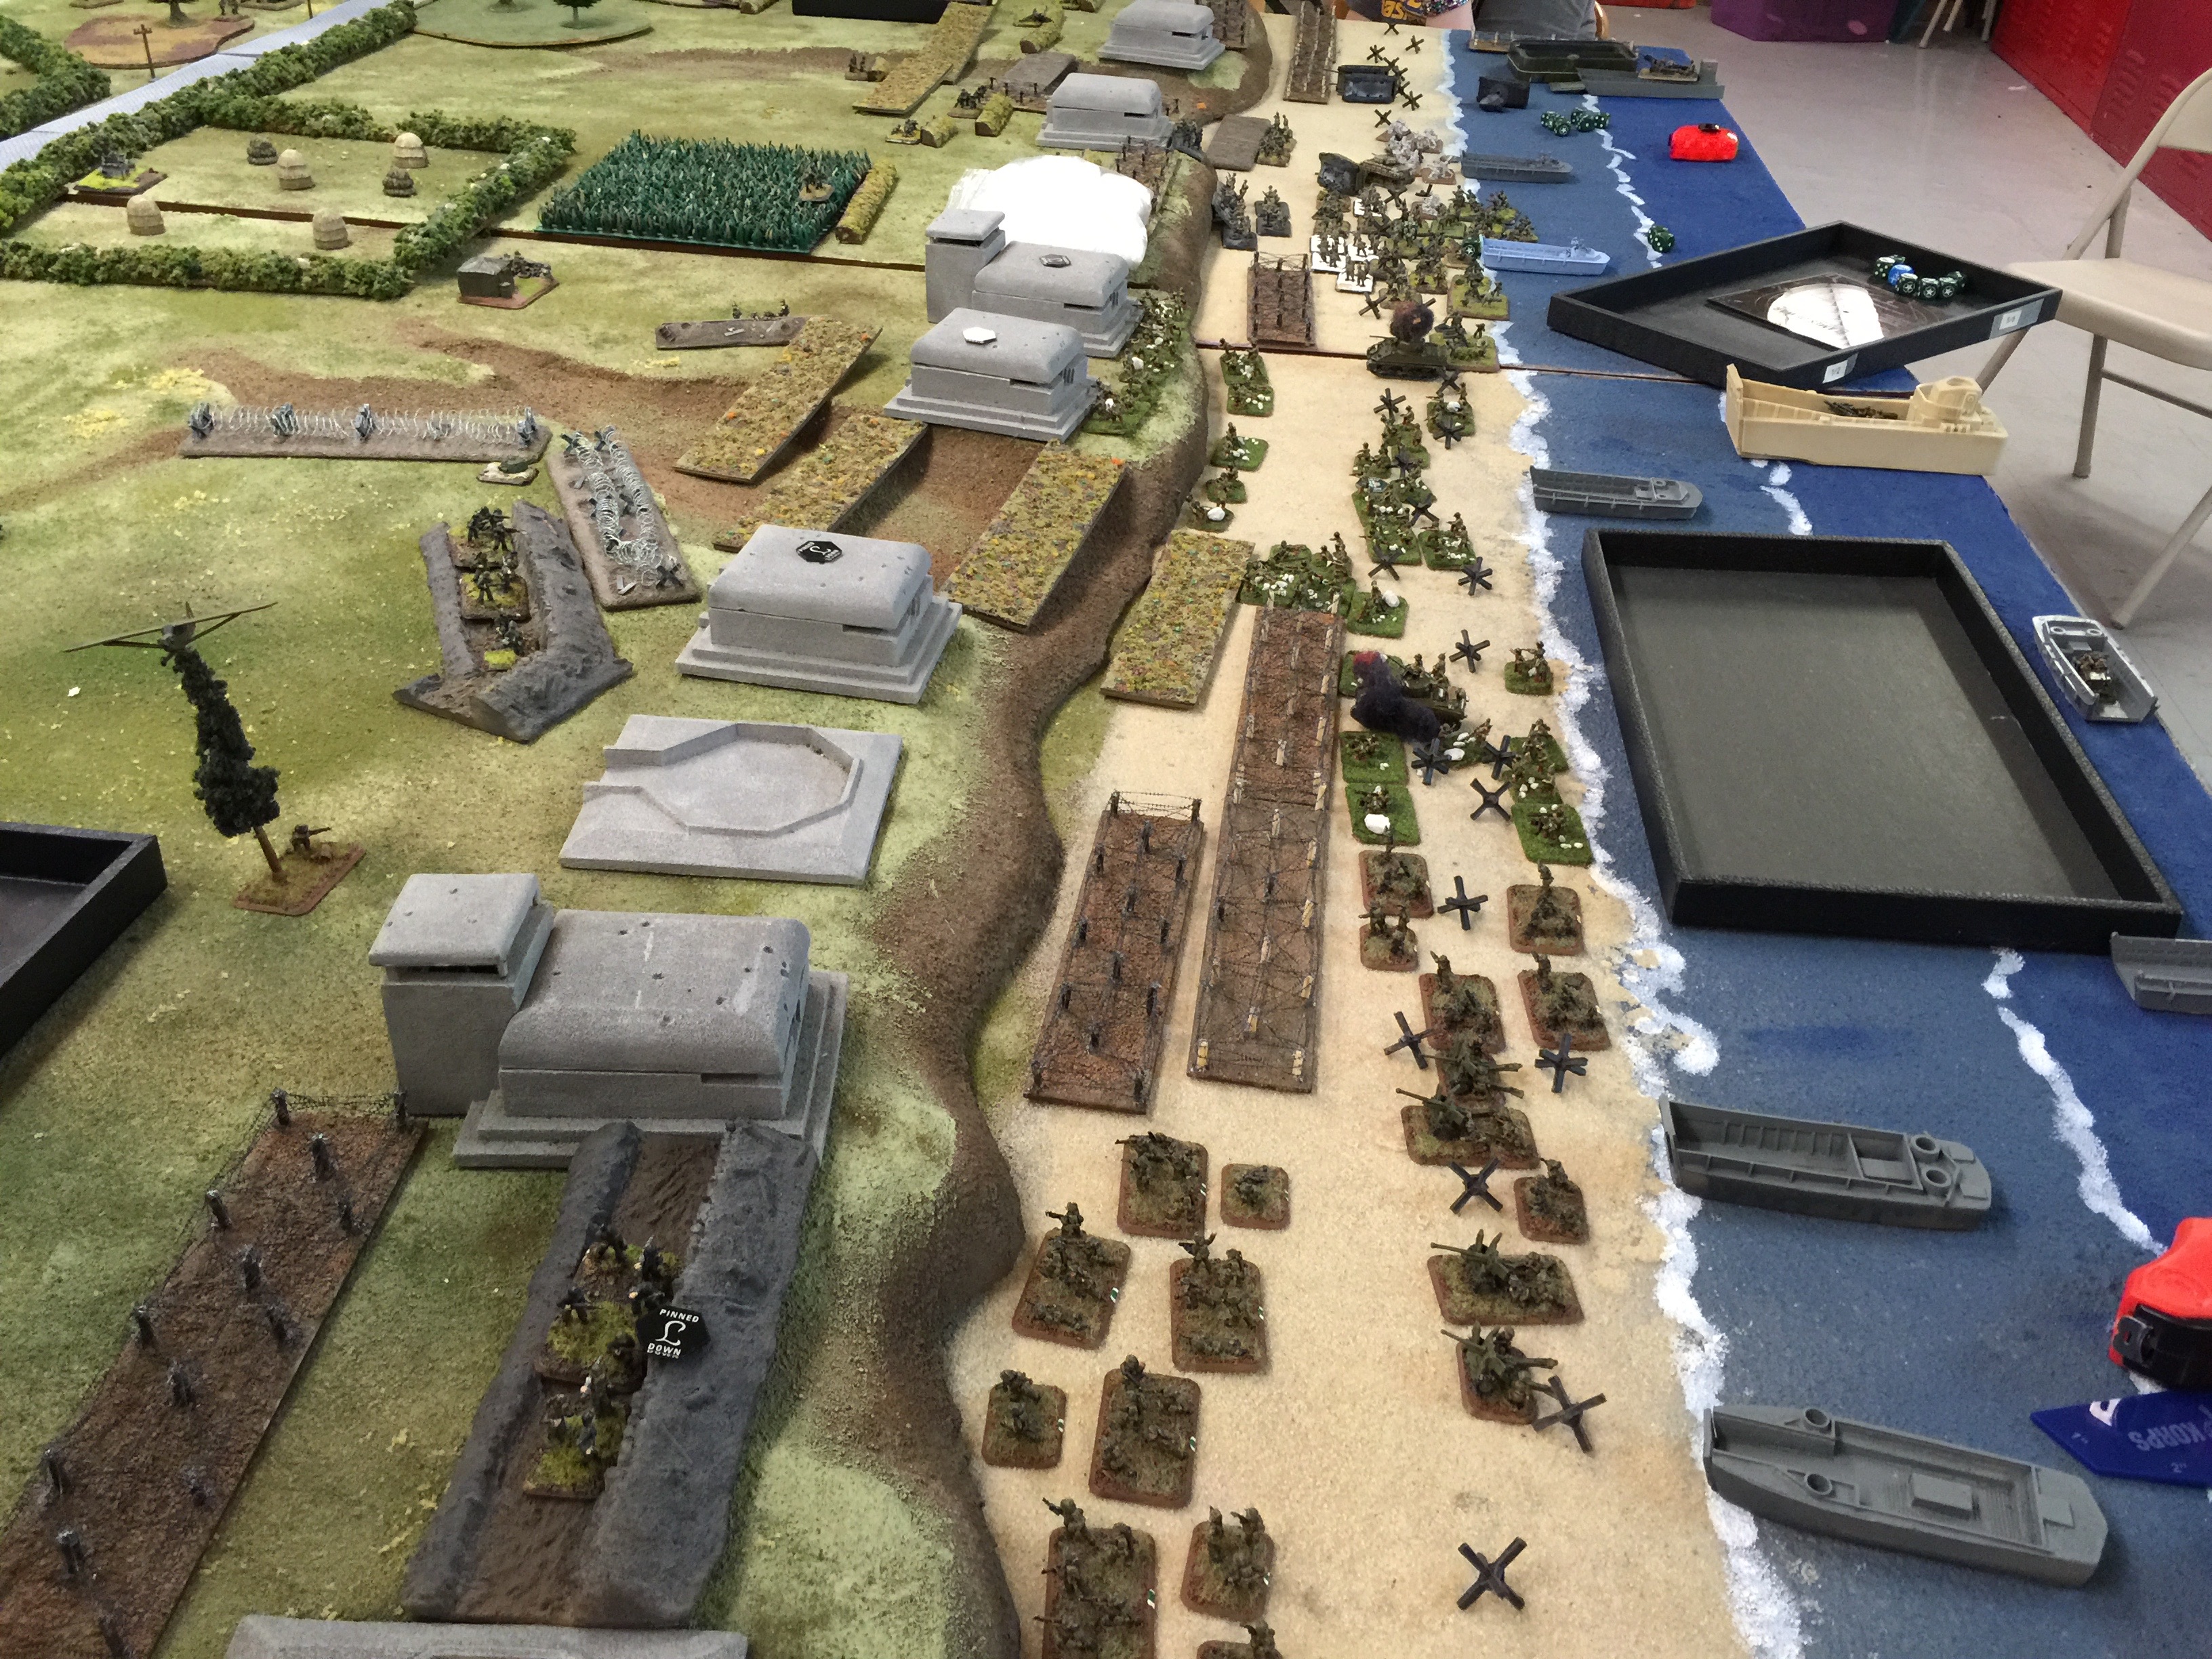
Top of turn 6, more assaults. One of the 4 mine fields was gone cleared by Bill’s pioneers, 3 more to go. To come up this way, assuming one could get past the bunkers, a trench on each side and an R-35 turret in support as well, tough approach from head on. Keith however was pressing from the flank.

Bottom of turn 6, I brought on my 2 armored quad 7/1 AA guns. The air and artillery having something to shoot at underscored it’s need. Meanwhile down on the beach it seemed like just a matter of time and Americans and Brits would be streaming up the hill.
Over on the far left with Collin having spent his forces and Mark unable to really abandon his position to come aid in support, it pretty much equalled game over for that part of the table.
Top of turn 7, and the assaults starting to happen. A trench, and two bunkers about to get a whole lotta love. Likewise Bill was able to gap yet another line of mines.
All of these actions would end up being successful, it was now down to me to throw back the Allies through a counter attack. Did I happen to mention I had just 1000 points?

Another German turn, a bit more reinforcements, this time another Platoon of Pz IVHs. Without infantry, artillery or air support tho, this was getting to be a desperate situation.
You can see on of the objectives in the upper left of the picture. It’s right by the bushes, that red looking thing.

Last turned that we played, turn 8, Keith moves up a first set of Shermans to peek up the route they would have to go. Bill’s force was pretty much spent at this point but a wide swath of bunkers was cleared, another wave would quite effectively be able to move onto shore and push.
You’ll notice that Keith had 8 25lbers off shore firing from their boats.
For the bottom half of turn 8, I put on my one and only platoon of infantry approximately on the center of the table and moved to cover the other objective. My tanks more or less held a defensive line and started to fire into Keith’s infantry that was in the trench. No change in situation and if we hadn’t called it at the end of 8, the next few turns were likely to feature a fun tank battle. Still I think the Allies were in the drivers seat. While they had till turn 12 to reach the objectives, the question would be would their material hold out. For us Germans tho, two Panzer IVH platoons, 2 quad AA guns and 1 6 stand infantry platoon isn’t much to hold off what we were facing.
While the question wasn’t settled to me it was a leaning Allied victory. They clearly had a beachhead and further waves would be able to push and make it ashore. Historically since the Germans really didn’t counter attack effectively this sure felt like a good historical result. Hard fighting, and finally a breakthrough.
Very good. Thanks.
Tom,
Nice write up. How did you remember all that action?
Tom,
The hero that assaulted the line and started the breakthrough was a plain old platoon leader. At the time they launched the assault, there was only the platoon leader and the light mortar left in the platoon!!!
Nice write up and thanks again to all the guys for a great game.
I look forward to playing with the group again some time.
Well Done. I very much liked much of the detail, the beach obstacles and wire were well done. Landing craft as well. It is very honoring to see you run D Day on D Day.
As to D Day heroes: Sgt. Walt Ehlers of the Big Red One was a CMH winner on D Day. You can easily find him on line. He got all the men in his squad off of Omaha beach and took out bunkers single handed. His brother had served with him in the same Plt for two years. For D Day they were split up. His brother was killed. Walt replaces a rifle team in an Assault squad as a hero who uses the CMH rules from FOW to continue an assault alone and hits a bunker on a 2+. We allow a variable point cost so the Walt is in the battle.
We also use Pvt. Duncan Grant. I saw his obituary last year in the paper and saved it. It noted that he was in the 4th ID at Utah on D Day, and that he survived. To take Duncan Grant for 5 points to replace a rifle team in a 4th ID assault plt. His ability; He rerolls one failed save in the course of a game, because he was lucky..
In our group in Pasadena we have done D Day on D Day the last two years. We use 1/700 scale ships for NGFS .I will ask our game director for that event post it up.
On a tactical note: The Sherman tank with bulldozer is the ticket to take out pillboxes. DUKW landed arty is awesome as we;;. and the DUKWs from Battle Front are awesome models! On an aesthetic: use burning tank smoke rather than flip over, more awesome!!
hey fellas, great game! I just wanted to let you guys know that smoking bunkers only has the effect of reducing their range to 16 inches. Infantry being shot at either in defensive fire or normally do not receive the +2 bonuses to be hit like smoking a target normally does. This is due to static positions having what called range cards, which is like a mini map that shows the environment around the position and ranges. So even if the gunner gets just a glimpse of a target he can quickly refer to his range card and get an approximate distance and the lay of the land, even if he cant actually see very far.